
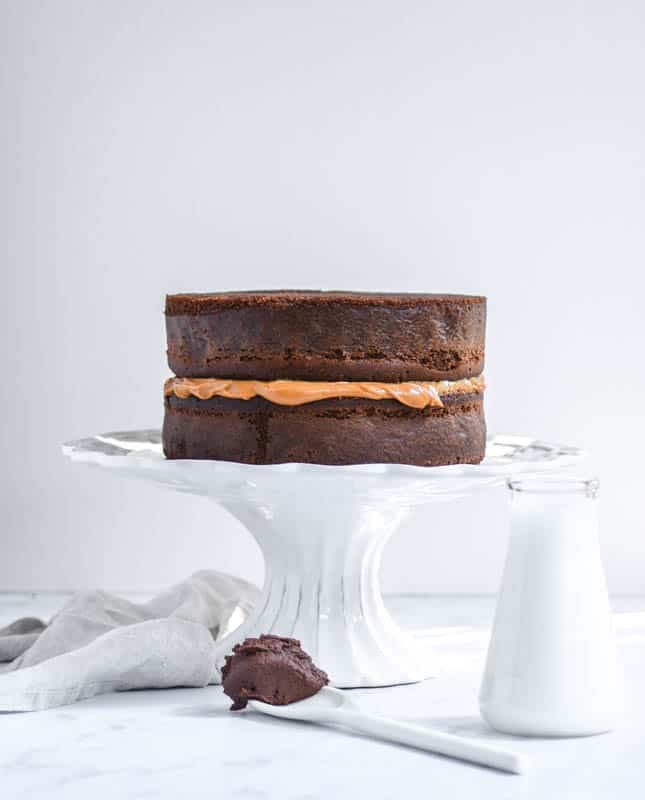
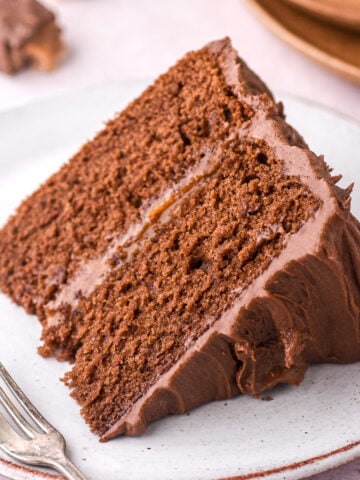
I love simple cakes; a great sponge and a delicious frosting are the way to my cake heart. This chocolate caramel birthday cake recipe is a recreation of the birthday cakes I had growing up. Layers of moist chocolate cake sandwiched with a thick spread of store-bought caramel (shhh!).

How to Make a Moist Chocolate Cake
The question most asked when baking a chocolate cake is, how to make a moist sponge. There are a few ways that a cake can dry out, whether through baking or storage. Knowing how to avoid these mistakes will help ensure that you bake perfectly moist and delicious cakes every time.
Firstly, pick a good recipe. Once you have chosen a quality recipe be sure that you do not overbake the cake. You should remove the cake just as a skewer inserted into the centre of the cake comes out clean.
Regarding storage, never allow your cakes to sit uncovered as the air will dry out the sponge. It is fine to allow the cake to cool without being covered but once it has cooled, wrap it in plastic wrap to avoid the sponge from becoming dry.
How to Layer a Chocolate Birthday Cake
Layering cakes can be quite a daunting task, however, if you follow these guidelines, you're sure to be on track to perfectly shaped frosted cakes.
The most important rule when layering cakes is to ensure that the cakes are completely cool before you start layering. Being impatient and frosting a cake before it has cooled can be disastrous. Buttercream frosting is very temperature sensitive and if the cake is still warm the icing will melt and the structure of the layered cake will be compromised. Think top layer sliding off the bottom, not the look we're going for!
I also prefer to let the cakes rest overnight before I cut and layer. This is because as the cake settles, air escapes from the sponge. If you allow this to happen before you start to layer your cakes you can avoid air bubbles peeking through your icing.

Should I Leave the Cake Unfrosted Overnight?
Cakes can be left unfrosted overnight, however, be sure to wrap the cakes tightly in plastic wrap. This will prevent the cake from drying out overnight. I prefer to allow my cakes to rest overnight before stacking, wrapped in plastic wrap, and left in the fridge.
Ingredients for a Simple Chocolate Caramel Birthday Cake Recipe
Simple ingredients are needed to make this chocolate caramel birthday cake! The ingredients needed are listed below
- Unsalted butter
- Granulated sugar
- Eggs
- Self-raising flour
- Salt
- Strong brewed coffee
- Full cream milk
- Vanilla extract
- Nestlé caramel treat
- Icing sugar
- Cocoa powder
- Whipping cream
How to Store a Chocolate Caramel Birthday Cake
To best store a cake, place the cake in an airtight container or on a cake plate covered with a cake dome at room temperature. When stored like this, cakes can last for up to 5 days. If you are worried about extremely hot weather, store the cake in the fridge and allow the cake to come to room temperature before serving.
Tips for Making the Perfect Chocolate Caramel Birthday Cake
These are my top tips for baking the perfect chocolate caramel birthday cake
- Before baking ensure that all of your ingredients are at room temperature, this is important not only for the baking of the sponge cake but also for the icing.
- Take time to prepare your cake tins, there are many ways to line cake tins but my preference is to brush the tins with sunflower oil and then line the tins with parchment paper. First, cut a circle for the base of the cake tin and then a strip for the side of the tin. This way you ensure that you never have to worry about your cakes getting stuck in the tin!
- Set the oven to the correct temperature and check the temperature using an oven thermometer.
- When creaming the butter and sugar together, ensure that your butter is at room temperature and is soft! This process can take some time and must not be rushed. The creaming is done when the mixture is light in colour and fluffy.
- Adding the eggs into the creamed butter and sugar must be done slowly. Wait about a minute between each addition and scrape down the sides of the bowl before adding the next egg.
- When adding the wet and dry ingredients in alternating additions, do this slowly and ensure that you scrape down the sides of the bowl regularly so that the mixture is beaten evenly.
- Once all the ingredients have been added, mix on high speed for about 30 seconds to ensure there are no lumps left in the chocolate cake batter.
These are my top tips for icing the perfect chocolate caramel birthday cake
- Before starting ensure that the butter is at room temperature, making buttercream icing with chilled butter is time consuming and makes it difficult to get the desired fluffy consistency of the icing.
- Once you have added all of the ingredients, beat the frosting on high speed for about 5 minutes. Fluffy light frosting is much easier to cover cakes with and goes much further!

I hope you enjoy baking (and eating) this chocolate caramel birthday cake! I'm warning you, it'll be hard to share!
Happy Baking
With Love,
Kitty
📖 Recipe

Chocolate Caramel Birthday Cake
Ingredients
Chocolate Cake
- 300 grams unsalted butter
- 500 grams sugar
- 6 eggs
- 500 grams self-raising flour
- 60 grams cocoa powder
- 1 teaspoon salt
- 240 ml strong, brewed coffee
- 350 ml milk
- 1 teaspoon vanilla extract
Chocolate Icing
- 250 grams unsalted butter
- 440 grams icing sugar
- 60 grams cocoa powder
- 4 tablespoon whipping cream
- 1 tin Nestle caramel treat
Instructions
Chocolate Cake
- Preheat the oven to 180°C and line x2 20cm round cake tins with sunflower oil and parchment paper.
- Place the butter in a bowl of an electric mixer fitted with a whisk attachment, beat the butter on high speed until white and fluffy. This can take 5 to 10 minutes.
- Swop the whisk attachment for the paddle attachment and add the sugar. Whisk on high speed until combined.
- Add the eggs, one at a time. Make sure to beat for at least one minute between each addition, and scrape down the sides of the bowl before adding the next egg.
- Sift together the flour, cocoa powder, and salt.
- Combine the milk, vanilla, and brewed coffee in a jug.
- Add the wet and dry ingredients to the egg mixture by alternating between them. Make sure there are no lumps by scraping down the side of the bowl as you go.
- Pour the batter into the prepared cake tins and bake in a preheated oven for about 50 minutes or until a skewer inserted into the centre of the cake comes out clean. Allow the cakes to cool before icing.
Chocolate Icing
- To make the icing, combine the butter, icing sugar, and cocoa powder in a bowl of an electric mixer fitted with a paddle attachment.
- Beat on medium speed until the mixture comes together. Slowly add the cream, whipping on high speed between each addition. Continue until you have added all of the cream and the icing is nice and fluffy.
- To assemble the cake, level the layers with a knife. Then place one layer onto a cake plate and spread an even layer of caramel over this layer.
- Place the second layer of cake on top of this.
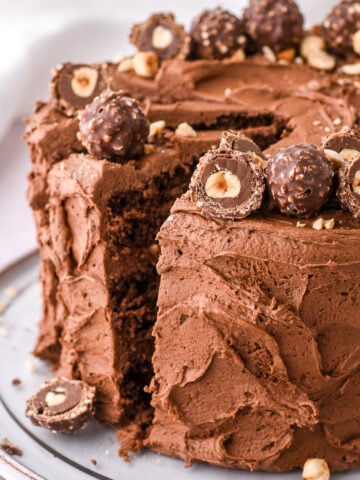
- Spread the icing over the top and sides of the cake using a palette knife. Swirl the icing using the palette knife. Enjoy!
Brett says
The perfect chocolate birthday cake recipe! Thanks for sharing Kitty