
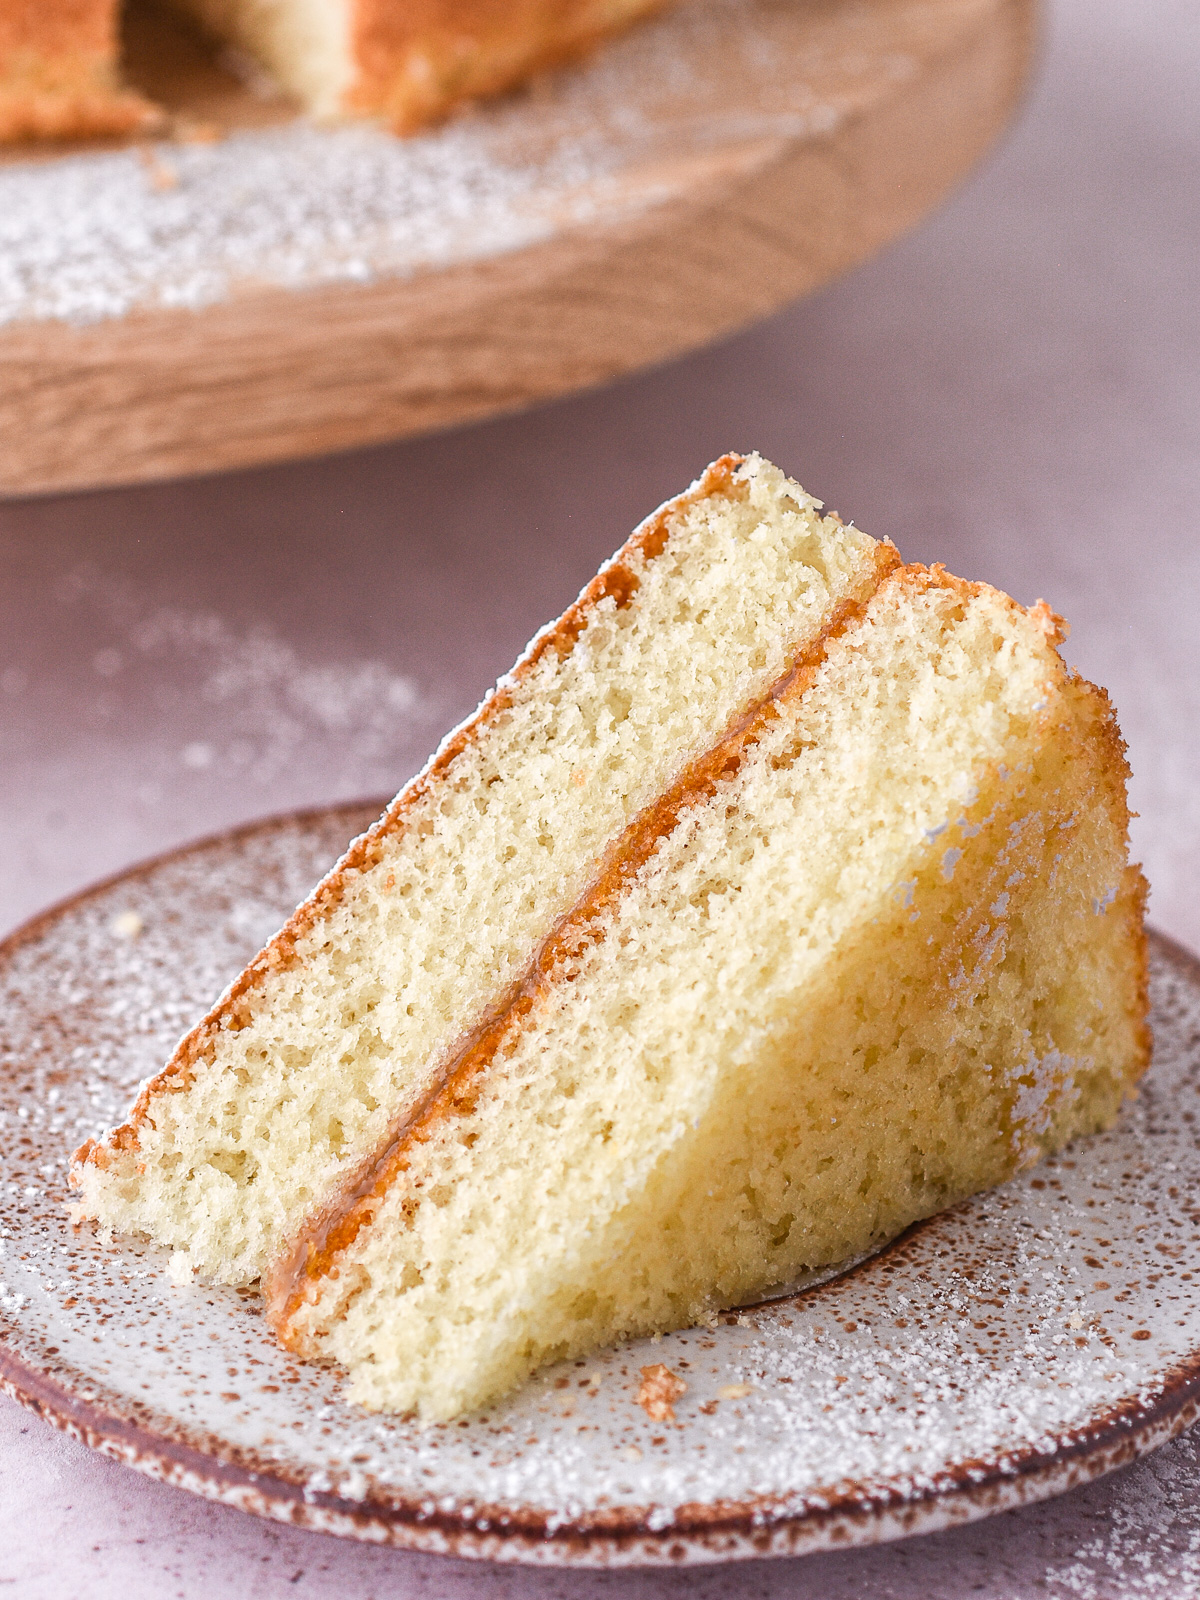
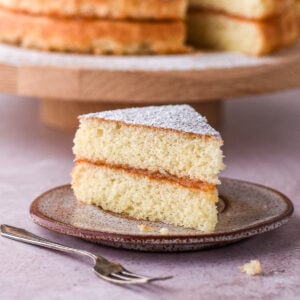
What was the first cake you ever learned to bake? The kind you can almost taste just by reading the recipe. This Hot Milk Sponge Cake is just that recipe for me. It is a quick bake that's perfect for beginner bakers.
If you love easy cake recipes, you need to check out this roundup of Easy Homemade Birthday Cake Recipes for Beginners.
Why This Hot Milk Sponge Cake Recipe Works
- Recipe name: Hot Milk Sponge Cake
- Ready in: 45 minutes
- Serves: 10 slices
- Main ingredients: Milk, flour, eggs, sugar, butter, baking powder, jam, and icing sugar.
- Perfect for: First-time bakers, or when you want to make a cake but only have simple ingredients at home.
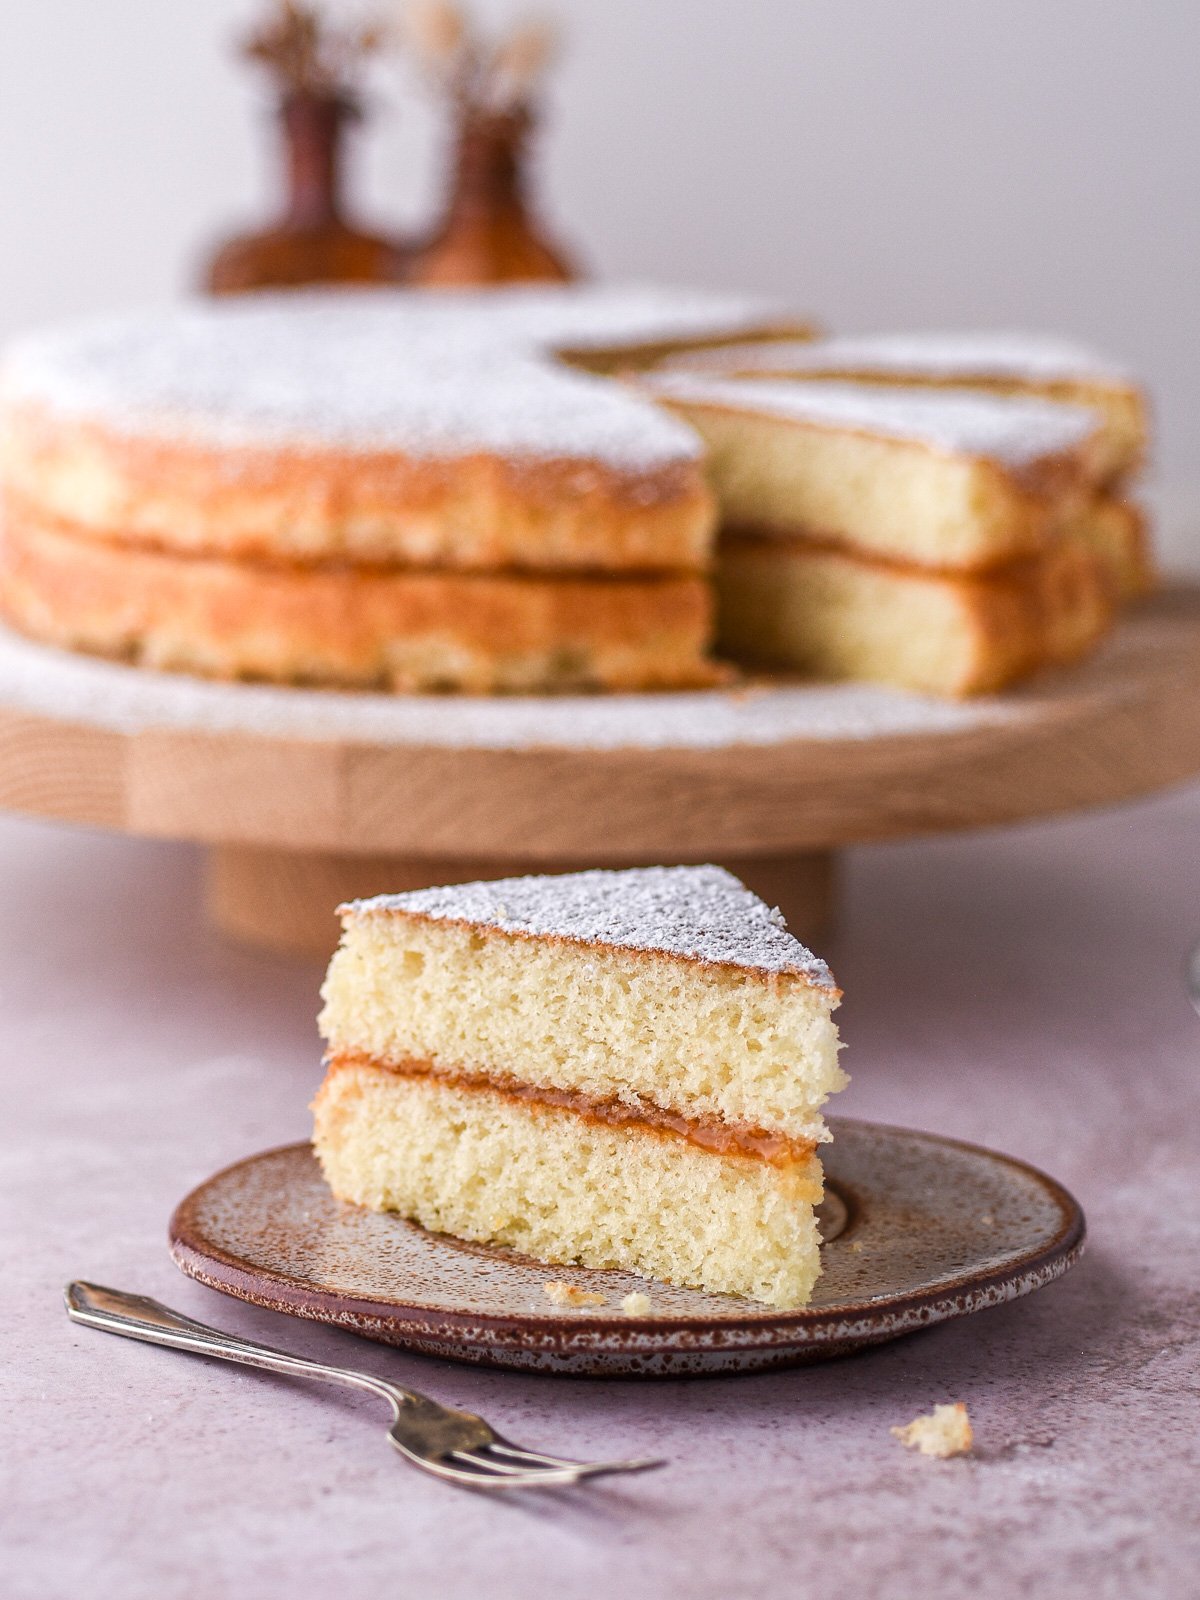
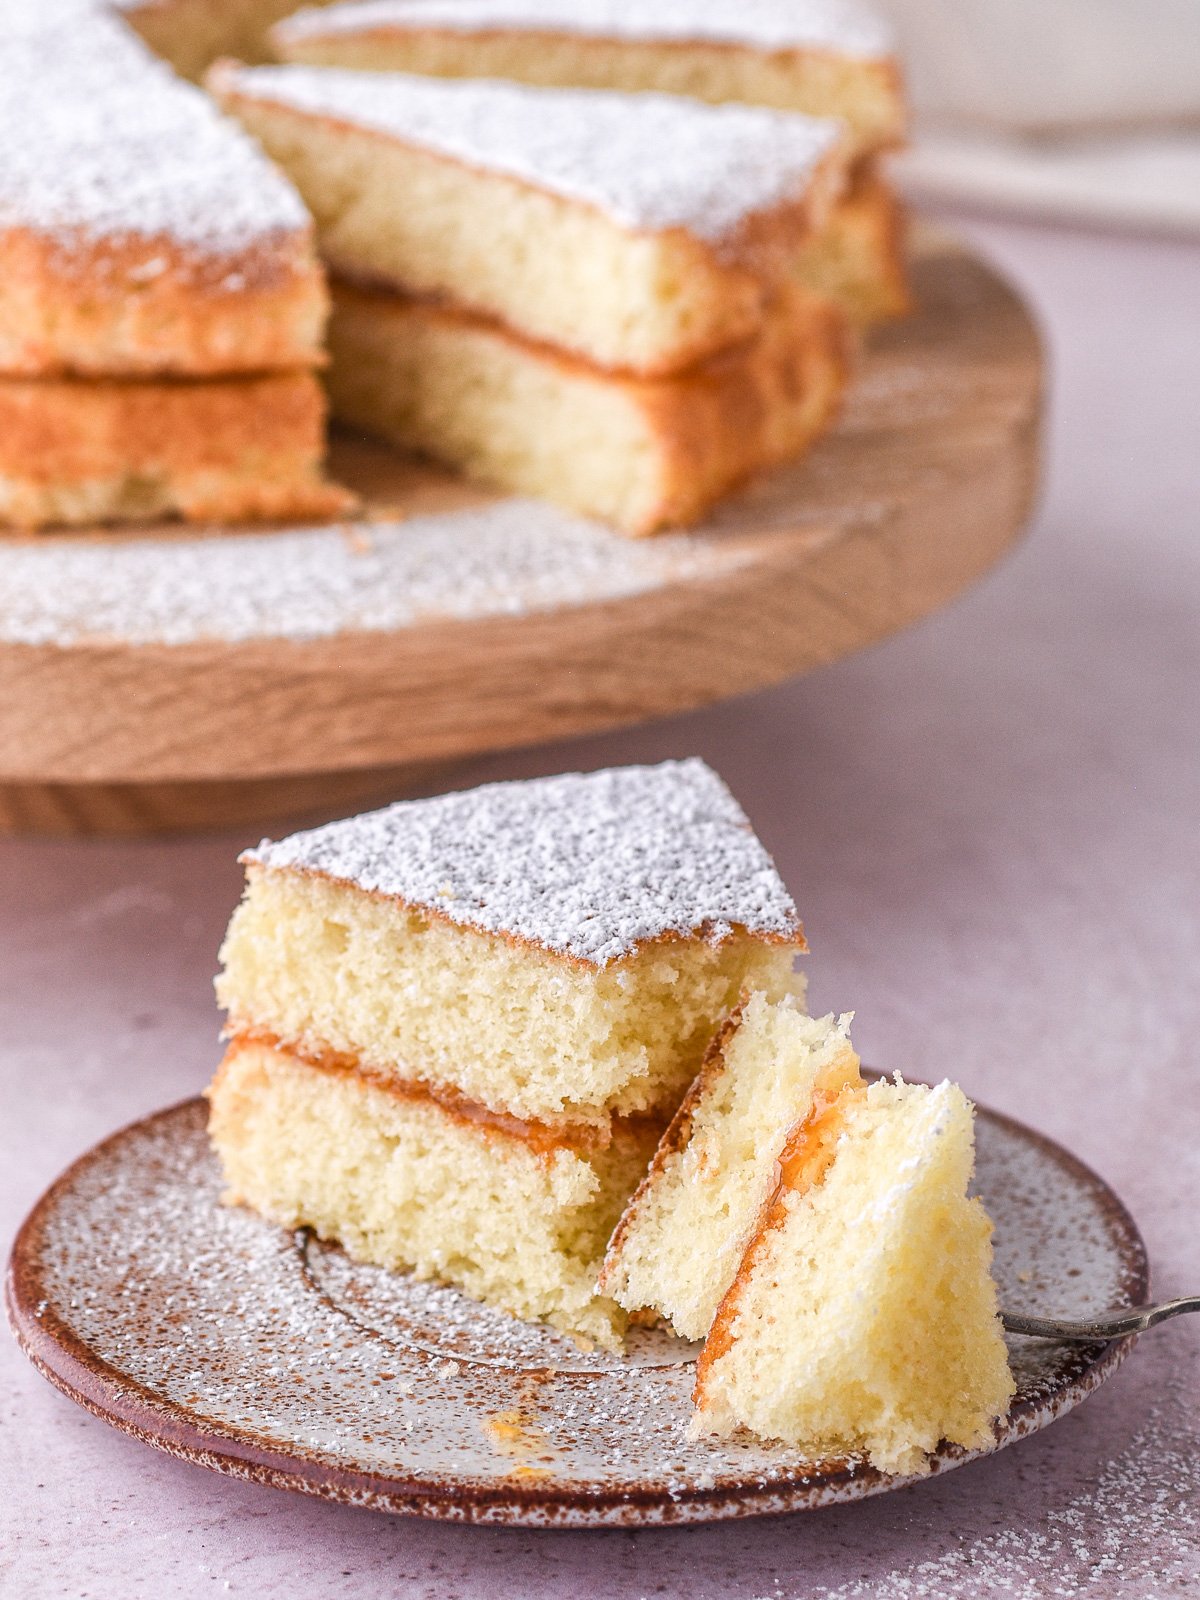
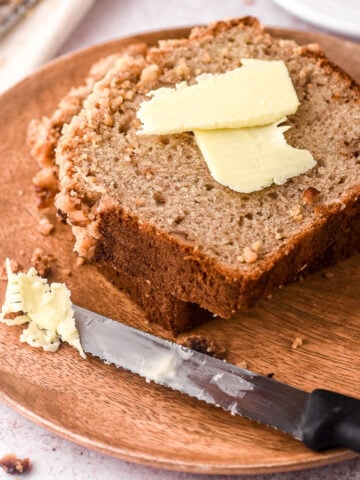
- Why I love it: This recipe is for a classic sponge cake, filled with jam and dusted with icing sugar-absolute perfection in its simplicity. It also only bakes for 12 minutes, and you don't have to wait for the cake layers to cool before sandwiching them together with jam!
- Calories: 188kcal
SUMMARIZE & SAVE THIS CONTENT ON
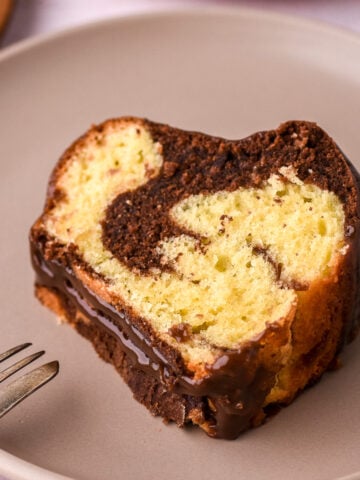
If you love simple butter cake recipes, try this Apricot & Almond Loaf Cake, this Raspberry and White Chocolate Loaf Cake, or this easy Chocolate Marble Bundt Cake with a chocolate drip.
Jump to:
Key Ingredients

- Whole milk - Choose full-fat milk for this recipe.
- Cake flour - This recipe uses a combination of cake flour and baking powder; you can choose to use self-raising flour instead.
- Jam - I love filling this cake with apricot jam; you can do the same or choose your favorite fruit jam. Why not make your own? This Spiced Cherry Jam and this Clementine Marmalade would be delicious fillings.
See the recipe card for full information on ingredients and quantities.
Variations
This is a great plain cake recipe you need to master; how you fill it is up to you. Raspberry, blueberry, or strawberry jam will all work, or you could make your own fillings. This Raspberry Cupcake Filling, this Blackberry Compote, and this Strawberry Cake Filling would all be delicious!
You may want to cover this cake in a frosting; in that case, my collection of Buttercream Frosting Recipes will help you out! This Passionfruit Buttercream would be amazing on this cake.
How to Make a Hot Milk Sponge Cake
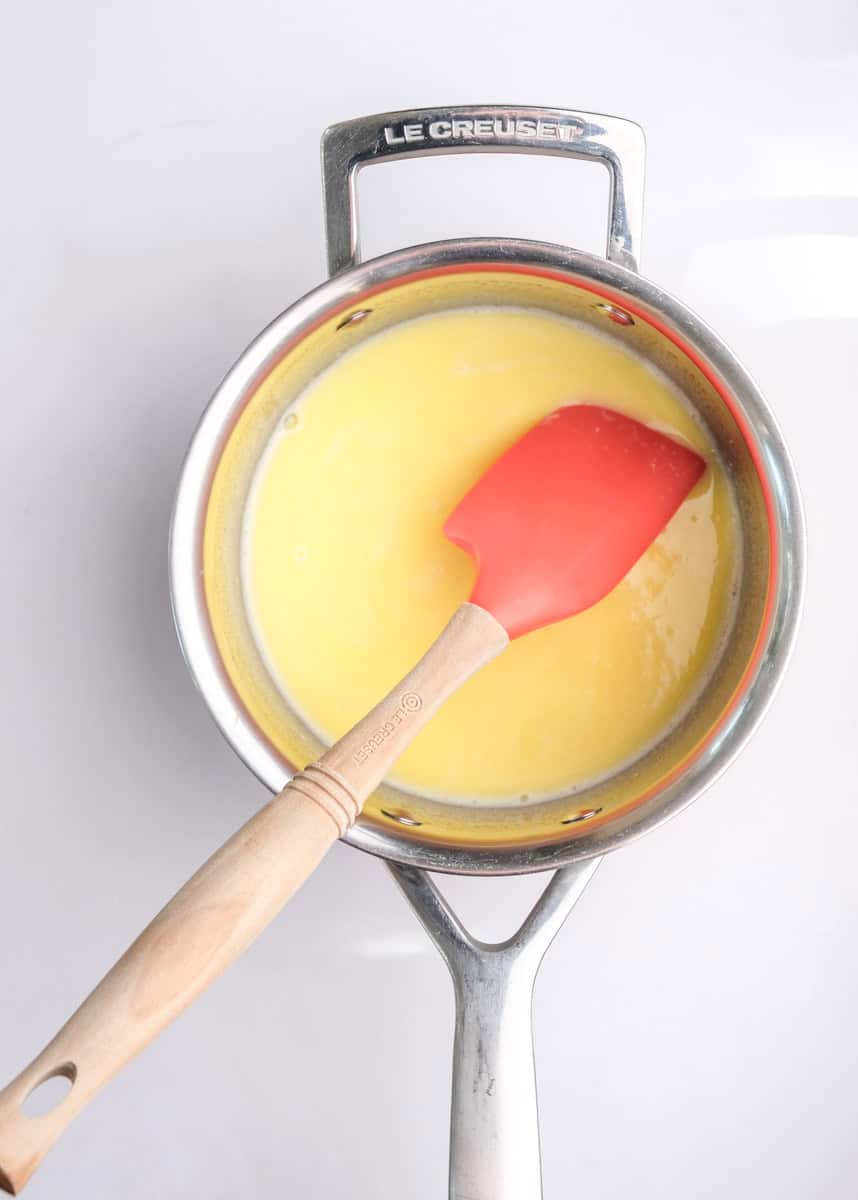
- Step 1: Preheat the oven to 180°C (356°F) and line 2x 20cm (8 inches) round cake tins with oil and parchment paper. Add the milk and butter to a small saucepan set over medium heat. Heat until the butter melts; do not boil. Set aside to cool slightly.
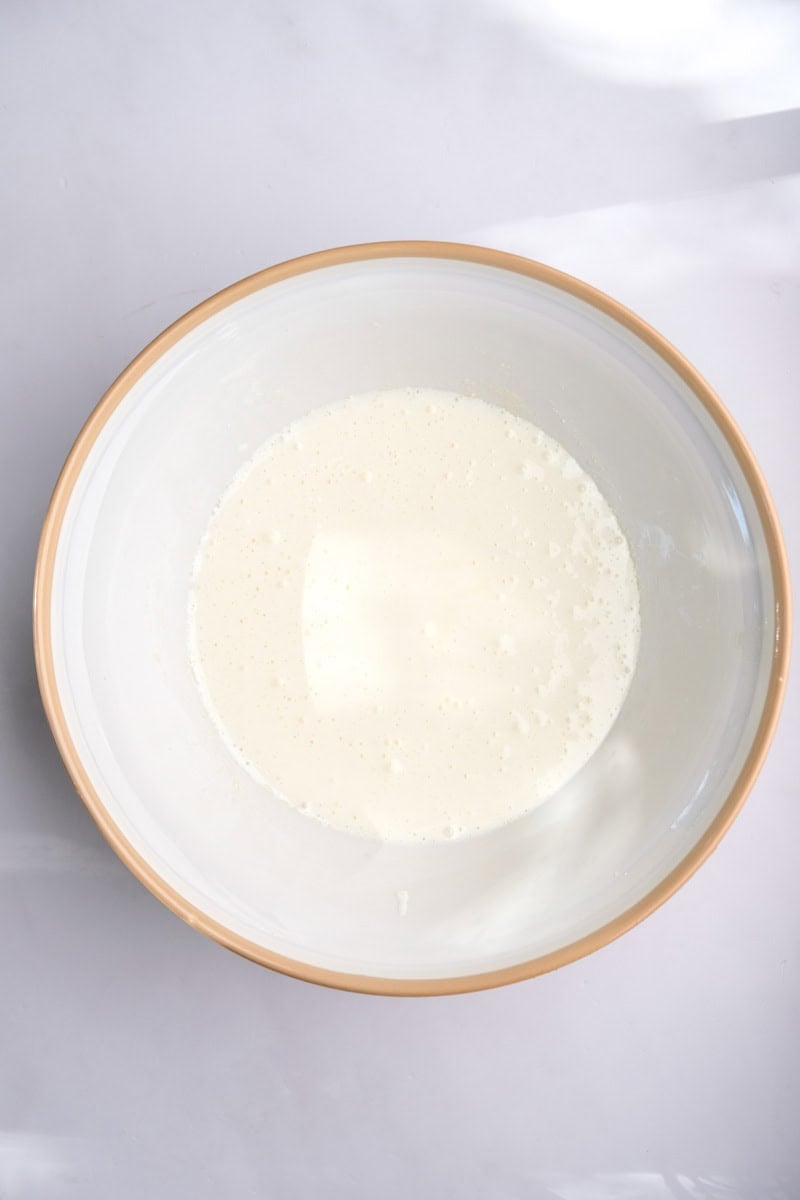
- Step 2: Add the whole eggs and sugar to a stand mixer fitted with a whisk attachment, and beat at medium-high speed until light in color and creamy.
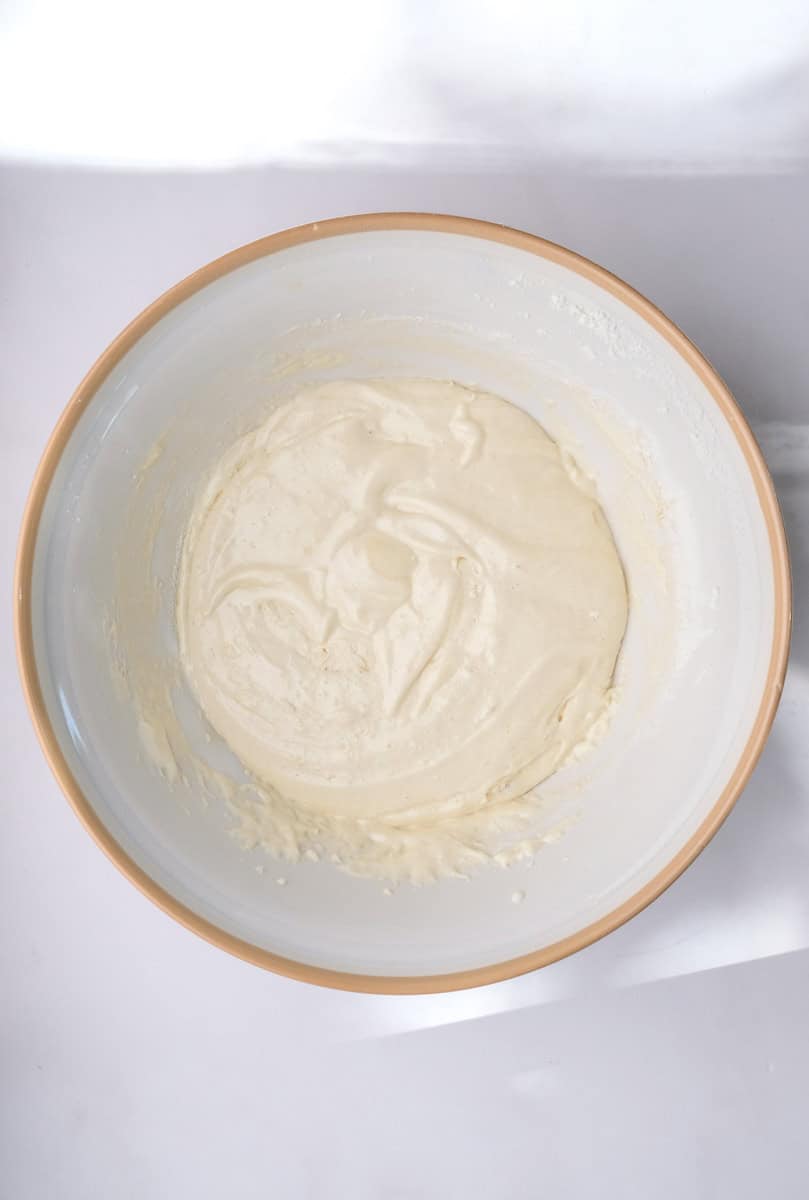
- Step 3: Sift the flour, salt, and baking powder into a large mixing bowl. Using a rubber spatula or large metal spoon, fold in the dry ingredients in 3 stages, taking care not to deflate the egg mixture.
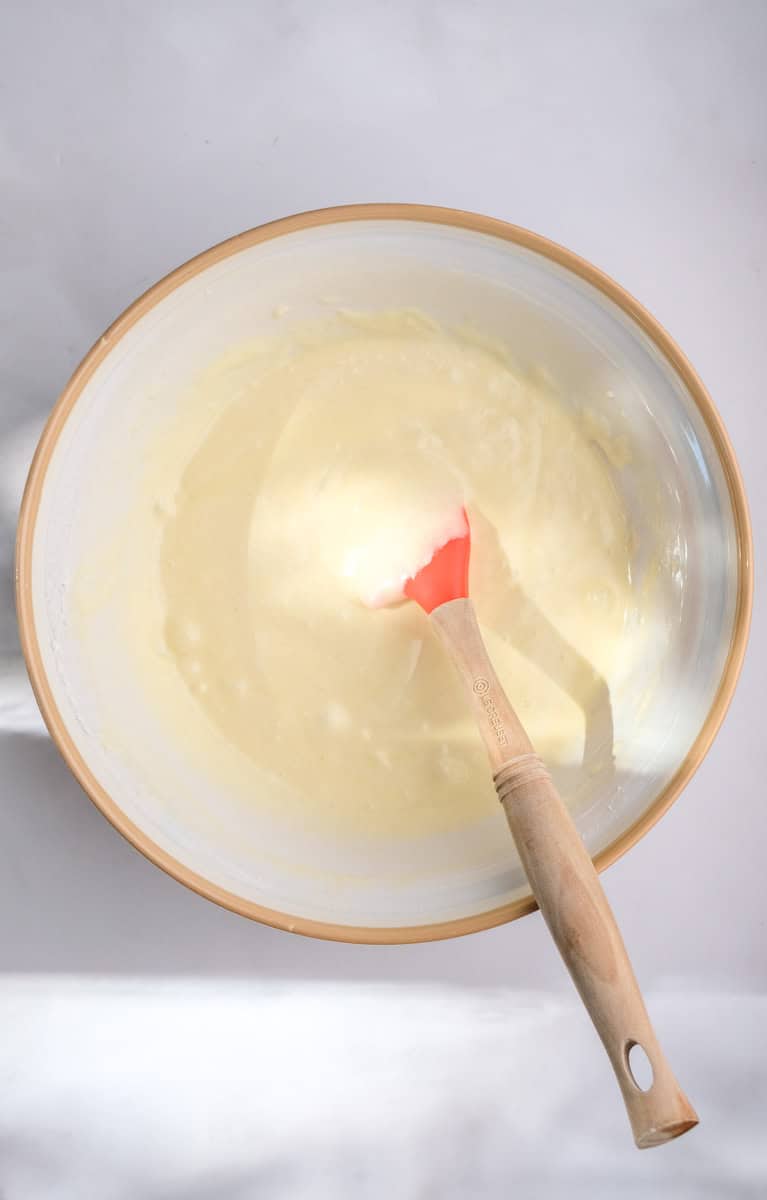
- Step 4: Pour the warm milk mixture down the sides of the bowl and then use a rubber spatula to mix the batter until combined. Pour the cake batter into the prepared tins.
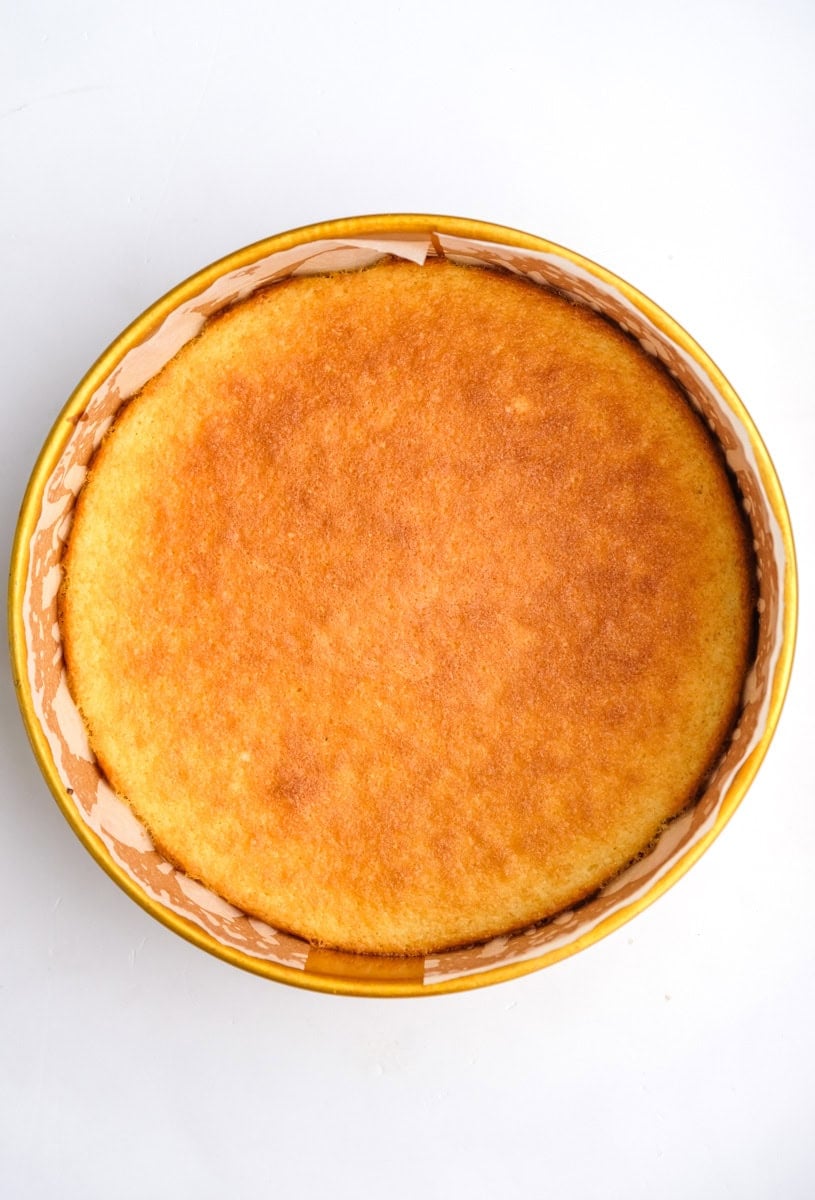
- Step 5: Bake in a preheated oven for 12 - 15 minutes or until a light golden brown and a skewer inserted into the center of the cake comes out clean. Remove the cakes from their tins and allow them to cool on a wire rack for about 10 minutes.

- Step 6: Place one cake layer on a cake plate and spread a layer of jam over the surface. Place the second layer of cake on top of the jam and dust the top of the cake with powdered sugar. Serve and enjoy!
What is a Hot Milk Sponge Cake?
A hot milk sponge cake is a classic sponge cake made by heating butter and milk together until melted, then adding them to whipped eggs and sugar, and folding in the dry ingredients. This method creates a light, tender sponge with a slightly crisp crust and a beautifully soft crumb.
Because the butter is melted instead of creamed, this cake skips the time-consuming step of beating butter and sugar until fluffy, cutting prep time almost in half. Hot milk sponge cakes can be baked in a sheet pan or round tins, but for this recipe, the batter is baked in two cake tins to make layering easy and foolproof.
If you'd like to try a recipe with a classic creaming method, try this Vanilla Cake with Chocolate Frosting.
Storage
This cake is best when eaten the day it is made, straight from the oven! It tends to dry out more quickly than other recipes, but you can store any leftovers in an airtight container at room temperature for about 2 days.
If the cake feels dry the next day, lightly warm a slice in the microwave and serve with cream or custard. For a cake that stays moist for days, try this Buttercream Birthday Cake or this Chocolate Nut Cake.
Expert tips
- Use an oven thermometer to test the true temperature of your oven, and adjust accordingly before placing the cakes into the oven.
- Bake the cakes in the middle rack of the oven.
- Allow the cakes to cool slightly on a wire rack before sandwiching them together with the jam. If the cakes are too hot, the jam will run and spill over the sides.
Hot Milk Sponge Cake FAQs
I always recommend using a kitchen scale rather than cups when baking, this way you can ensure you've measured properly and that your baked goodies come out perfectly.
Be careful not to knock out all the air you have incorporated into the batter when folding in the dry ingredients or when adding the milk. Also, make sure you check the expiry dates of your flour and baking powder, as they affect the cake's rise.
I always recommend serving freshly made cakes, but if you need to freeze this cake, cut it into slices, wrap each slice in plastic wrap, and freeze for up to 2 months. Defrost at room temperature before consuming.
This is a simple recipe, but it isn't very forgiving, so I recommend sticking to the suggested pan sizes.
Yes! You can use a handheld electric mixer or a standard whisk to whip the eggs and sugar, if needed.
More Easy Cake Recipes Without Frosting

Simple bakes that taste great are the key to this caker's heart. This is the perfect recipe to make for a tea party, for that late-night cake craving, or for a newbie baker looking to make their first birthday cake. If you are looking for more birthday cake inspo, see my list of Easy Homemade Birthday Cake Recipes for Beginners.
Happy Baking, With Love, Kitty
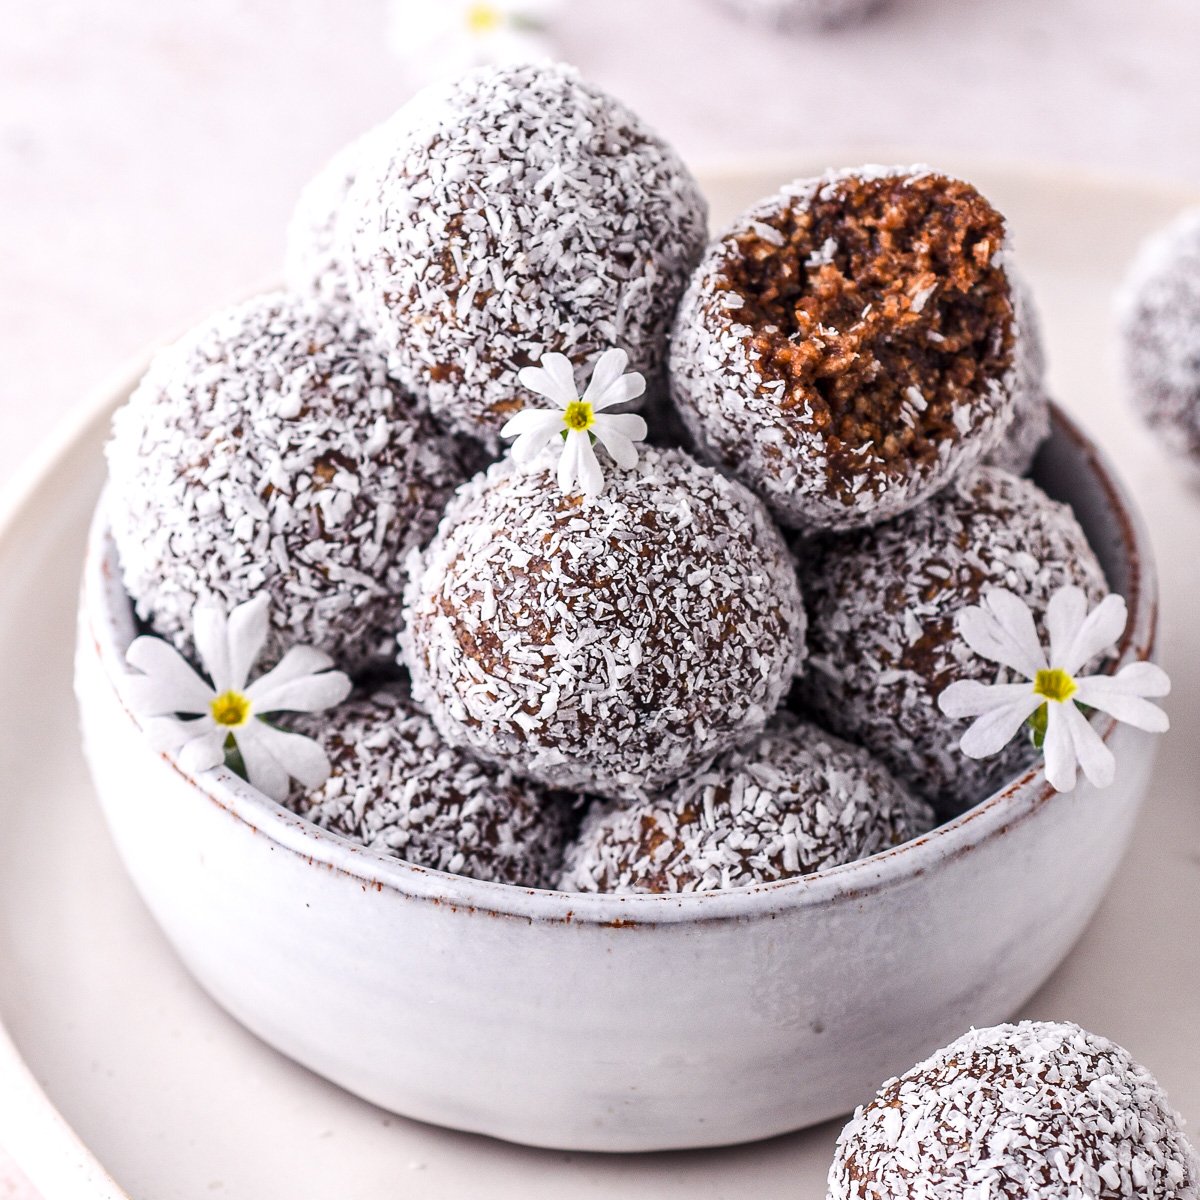
Please leave a star rating and comment below if you tried this recipe! And if you're wondering what to try next, have a look at these easy no-bake Chocolate Condensed Milk Truffles!
📖 Recipe
Hot Milk Sponge Cake
Equipment
- 2x 20cm (9 inches) cake tins round
Ingredients
- 60 g unsalted butter
- 100 ml milk
- 120 g cake flour
- ¼ teaspoon salt
- 2 tsp baking powder
- 160 g sugar white granulated
- 2 eggs extra-large
- 1 teaspoon vanilla extract
- 80 g apricot jam
Instructions
- Preheat the oven to 180°C (356°F) and line 2x 20cm (8 inches) round cake tins with oil and parchment paper.
- Add the milk and butter in a small saucepan set over medium heat. Heat until the butter melts, do not boil. Set aside to cool slightly.
- Sift the flour, salt, and baking powder into a large mixing bowl.
- Add the whole eggs and sugar to a stand mixer fitted with a whisk attachment, and beat at medium-high speed until light in color and creamy.
- Using a rubber spatula or large metal spoon fold in the dry ingredients in 3 stages, take care not to deflate the egg mixture.
- Pour the warm milk mixture down the sides of the bowl and then use a rubber spatula to mix the batter until combined.
- Pour the cake batter into the prepared tins and bake in a preheated oven for 12 - 15 minutes or until a light golden brown and a skewer inserted into the center of the cake comes out clean. Remove the cakes from their tins and allow them to cool on a wire rack for about 10 minutes.
- Place one cake layer onto a cake plate and spread a layer of jam over the surface of the cake. Place the second layer of cake on top of the jam and dust the top of the cake with powdered sugar. Serve and enjoy!
Notes
- Fold the dry ingredients into the egg mixture carefully, don't dump the flour over the mixture as this will deflate the batter.
Claire says
Simple, delicious, and the perfect easy cake recipe!